
Payments, payment links and bookings
Clients can take card payments straight into your studio’s own Stripe account. Connect the account once under Payments, then use it for:
- Payment links: a link for a set amount, such as a retainer or a gift card
- Bookings: sessions clients can book from your studio website, with add-ons and a deposit, which you then confirm or decline
- Invoices your clients pay online
- orders from client galleries
Frameleaf takes no fee on any of these payments, and there’s no Clients plan to buy. Stripe charges its own processing fees, which come out of each payment, and payouts go to your studio’s bank account on Stripe’s schedule.
Connect a payment account
Section titled “Connect a payment account”You need:
- this server linked to Frameleaf Cloud, which passes Stripe’s payment notices to your server, so nothing on your network needs to be opened to the internet
- a Public server URL your clients can reach, so Stripe can send them back to your pages after paying
Then:
- Open Clients, then Payments in the left rail.
- Under Connect a payment account, choose Connect account.
- Stripe opens. Sign in to your Stripe account or create one, and enter your business and bank details. Stripe asks for these directly; Frameleaf never sees them.
- When you finish, Stripe sends you back to Payments.
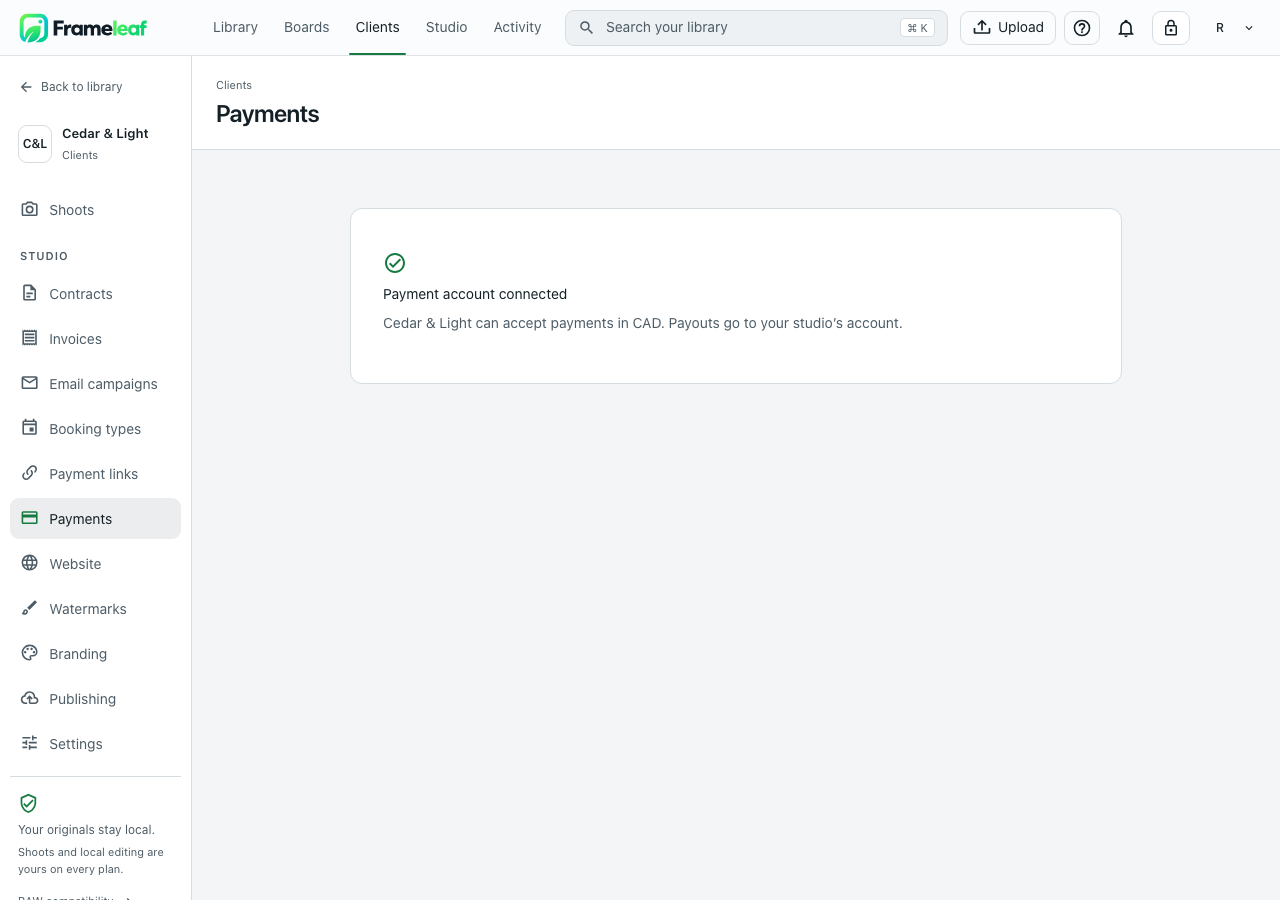
| What Payments shows | What to do |
|---|---|
| Connecting your account… | Stripe is still setting the account up. Check back in a few minutes |
| Your account needs attention | Stripe needs more details. Choose Continue setup to finish in Stripe |
| Payment account connected | You’re ready. The page shows the currency your account takes payments in |
| Link this server to Frameleaf Cloud to connect your studio’s payment account. | Link the server first, then come back |
The account is a standard Stripe account in your studio’s name. You manage refunds, disputes and payouts in your Stripe dashboard, and refunds you make there show up on the matching invoice or payment in Frameleaf.
Each Frameleaf account connects its own studio’s Stripe account, so photographers sharing one server are paid separately.
Without a payment account, Clients still works: galleries, bookings and invoices are recorded, and you mark payments as received yourself.
Payment links
Section titled “Payment links”A payment link is a page where someone pays an amount you set. Use one for a session retainer, an album balance, a gift card, or anything else that doesn’t need an invoice.
Open Clients, then Payment links.
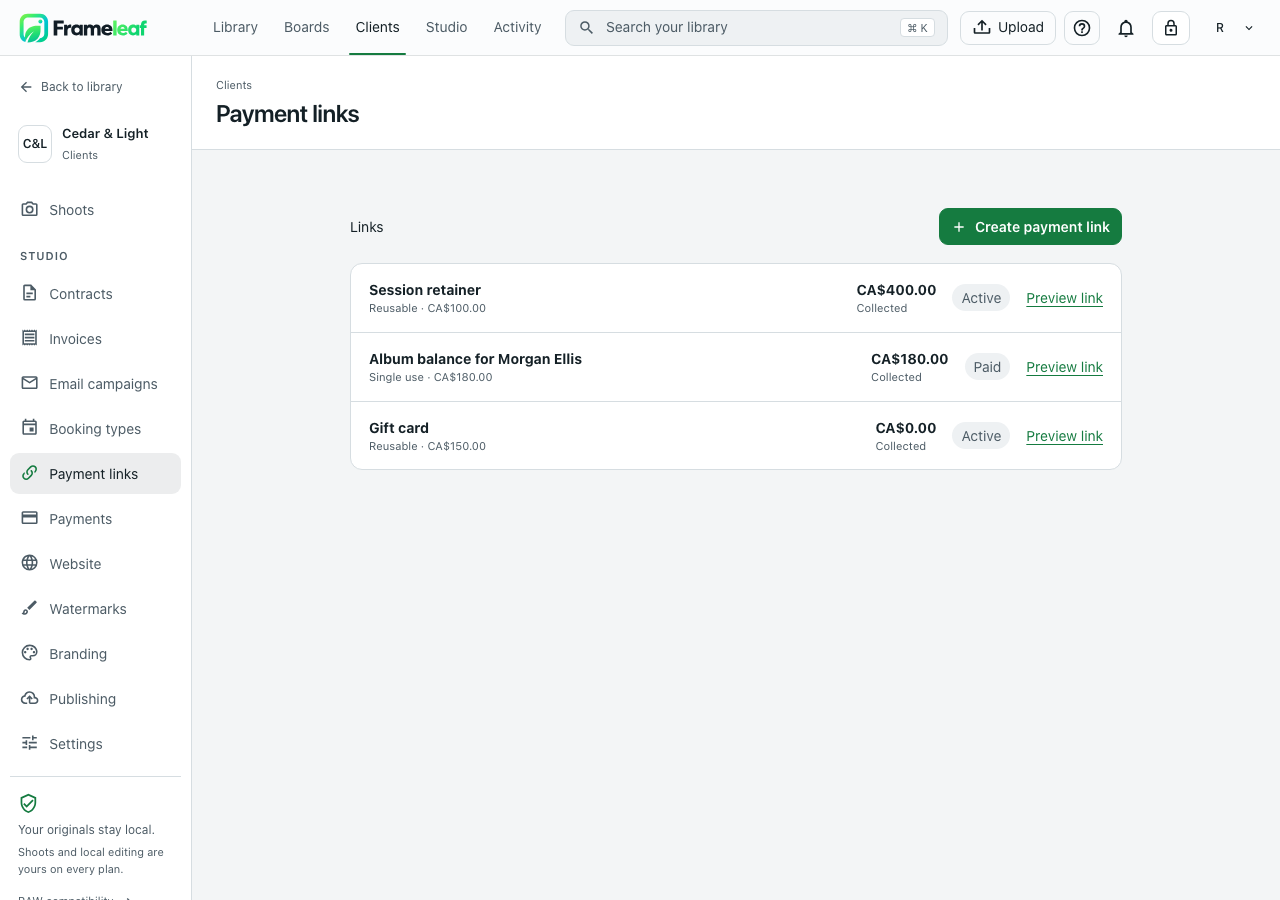
- Choose Create payment link.
- Enter a Title the client will see, the Amount and the Currency.
- Add an optional Note for the client.
- Under Who can pay, choose Anyone with the link for a link many people can pay, or One payment only for a link that closes after it’s paid once.
- Choose Create link.
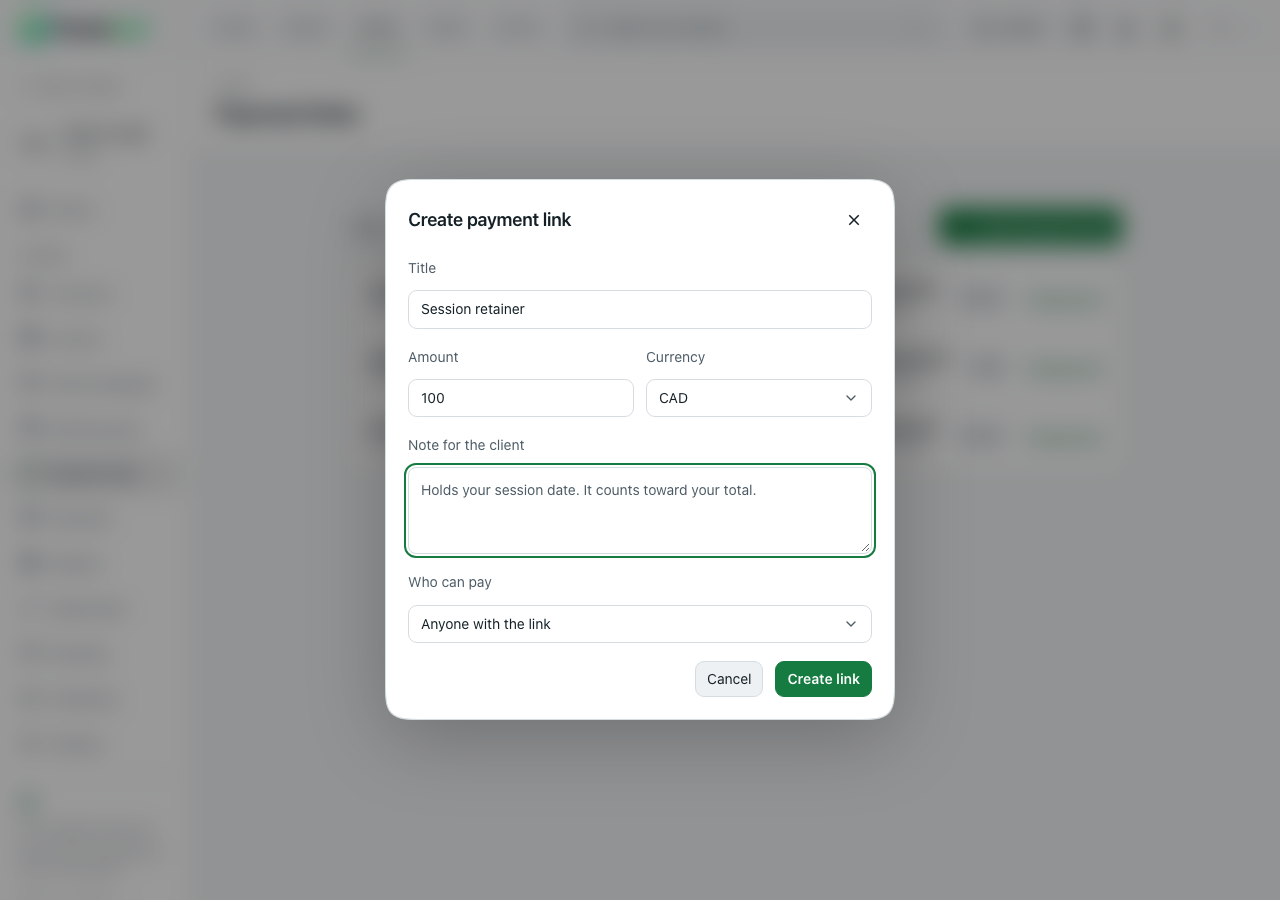
Each link shows whether it’s Reusable or Single use, its amount, how much it has Collected, and its status: Active, or Paid once a single-use link has been paid. Choose Preview link to open the payment page, then copy its address from your browser to share it.
What the payer sees
Section titled “What the payer sees”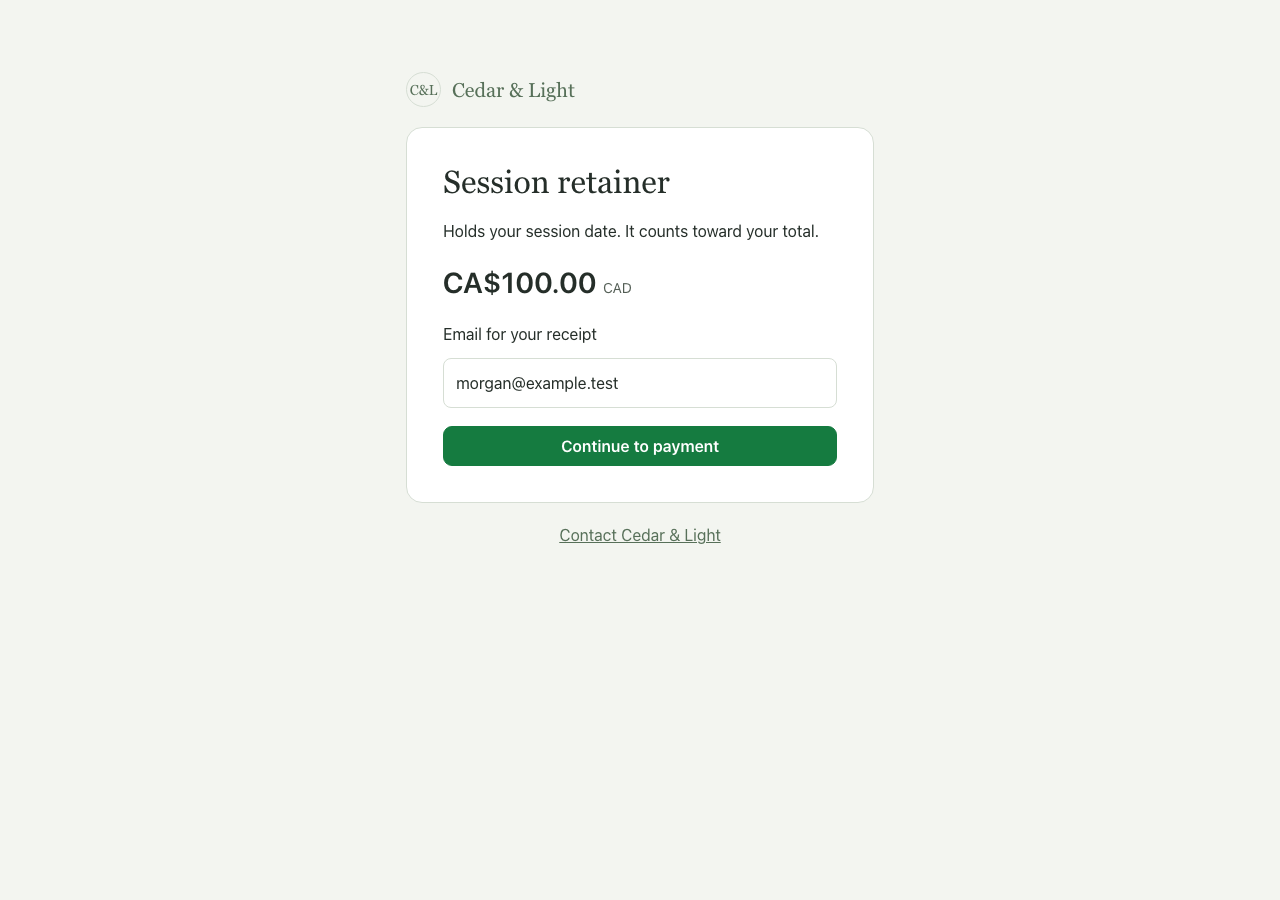
The page shows your studio’s name, the title, your note and the amount. The payer enters an Email for your receipt and chooses Continue to payment, then pays on Stripe’s secure checkout. They can’t change the amount.
Back on your page, they see Thank you for your payment once Stripe confirms it. If confirmation takes a while, the page says Still waiting for confirmation and offers Check again. A single-use link that has been paid shows This payment link is unavailable.
Booking types
Section titled “Booking types”Booking types are the sessions clients can book from your studio website, each with a price, a length, optional paid add-ons and an optional deposit.
Open Clients, then Bookings, and choose the Booking types tab.
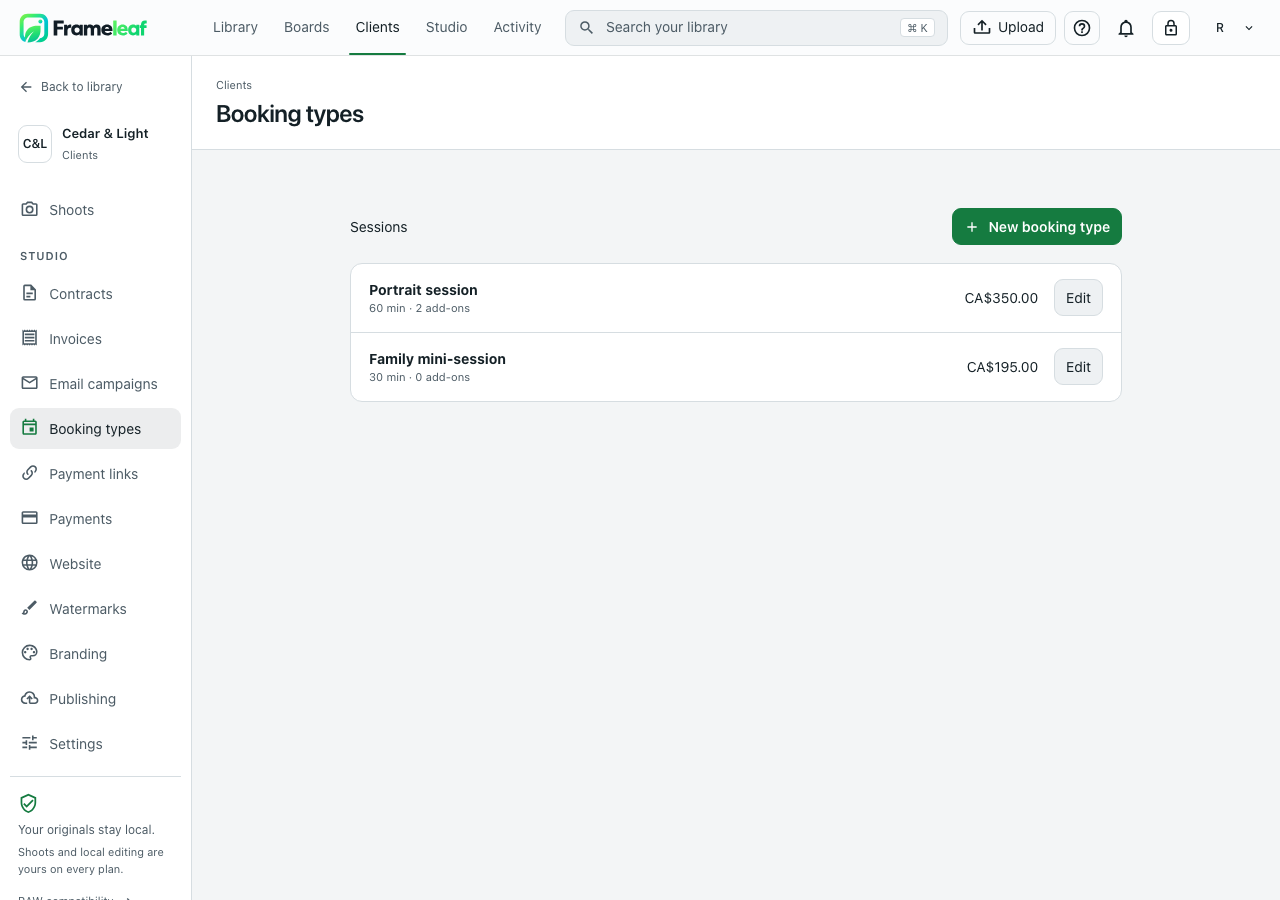
- Choose New booking type.
- Enter the Session name and its Length in minutes.
- Choose the Currency, then enter the Price and the Deposit. Enter a deposit of 0 if you don’t want one; it can’t be more than the price.
- To offer extras, choose Add an extra and enter its Name, Price and Maximum quantity, such as extra edited photographs or a printed album. Choose × to remove one.
- Choose Save booking type.
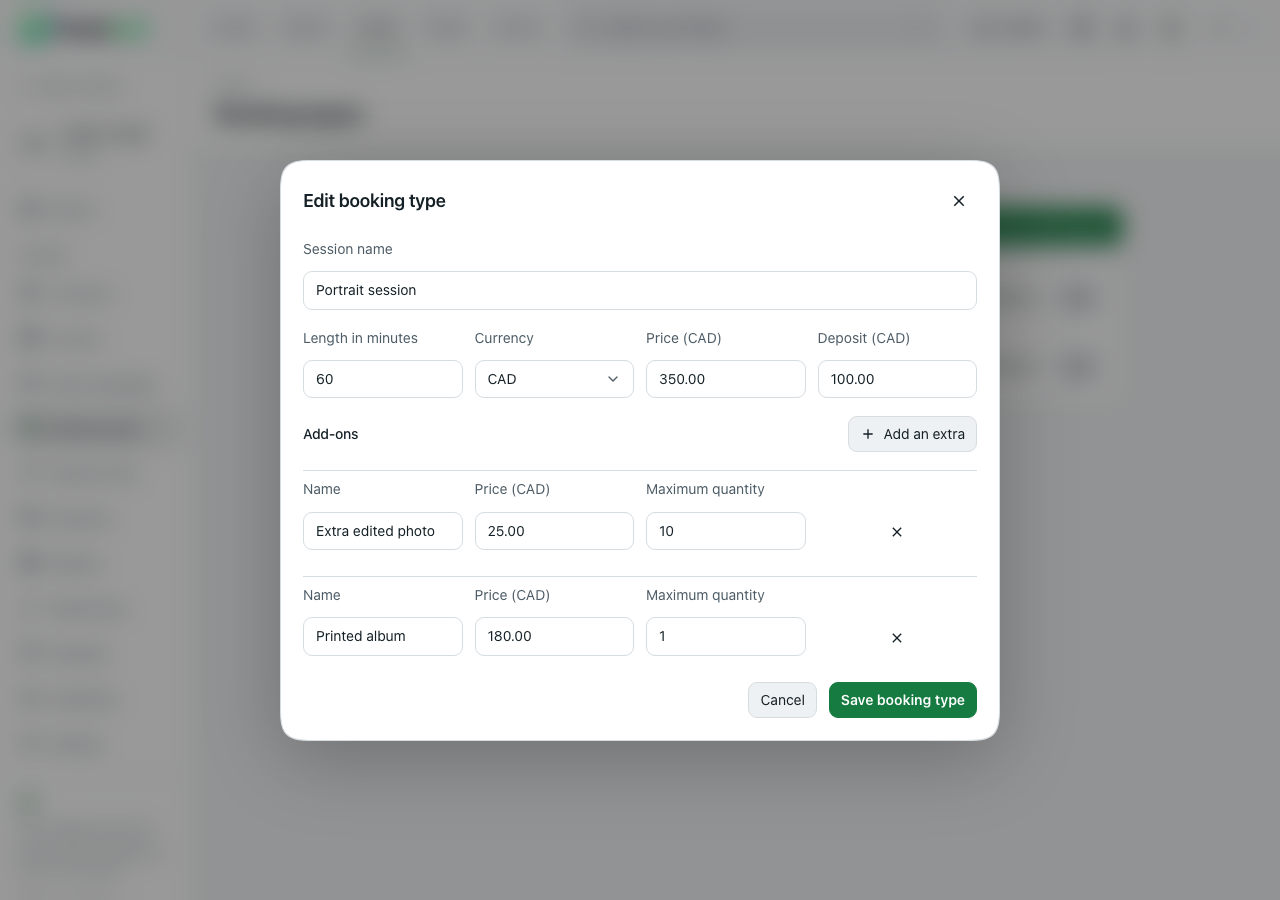
Choose Edit beside a booking type to change it. Changes apply to new requests; requests already made keep the price they were made at.
What clients see
Section titled “What clients see”Once you have at least one booking type, your published studio website shows a Book a session section with a card for each one. Choosing Book on a card opens the form on that session. See Booking on your website.
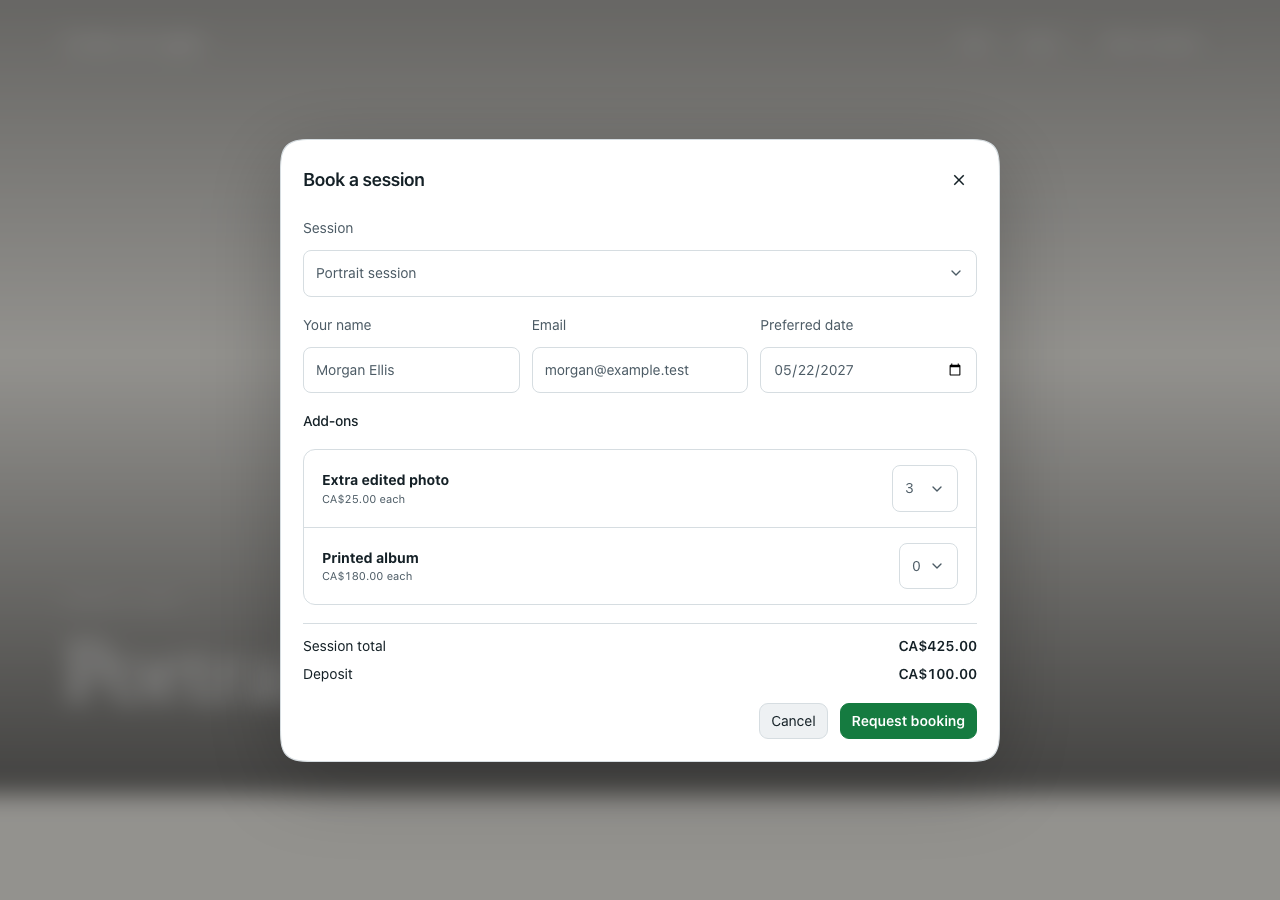
- The client chooses a Session, then enters Your name, Email and a Preferred date.
- Under Add-ons, they choose how many of each extra they want.
- They check the Session total and the Deposit, then choose Request booking.
Your server works out the total from the booking type and the add-ons chosen, never from what the page sends, so the price can’t be changed on the way.
- With a deposit and a payment account connected, the client goes on to Stripe’s checkout to pay the deposit, then returns to your website.
- Without a deposit, or without a payment account, the request is sent straight away and you arrange payment with the client.
Either way, the client sees Booking request received and The studio will confirm your date. A booking request reserves nothing on its own: you confirm the date with the client.
Each request arrives in Bookings, under Requests, for you to confirm or decline. It’s also listed under Inquiries on your Website page, and the client is added to your Leads for email campaigns. Deposits arrive in your Stripe account like any other payment.
Booking requests
Section titled “Booking requests”Open Clients, then Bookings. The Requests tab lists the bookings clients make on your website.
Find a request
Section titled “Find a request”The buttons at the top show Waiting, Confirmed, Declined or All requests, with a count on each. Waiting is shown first.
Each request shows the client’s name, the session, the dates they’d prefer, the total, and where the deposit stands:
| Deposit | What it means |
|---|---|
| No deposit | The booking type doesn’t ask for one |
| Deposit not paid yet | The client hasn’t paid yet, or left Stripe’s checkout before paying |
| Deposit payment failed | Stripe declined the payment |
| Deposit paid | The deposit is in your Stripe account |
| Deposit refunded | You refunded it in your Stripe dashboard |
You don’t need to reload the page. A new request appears straight away, marked New, with a New booking request from message and a Review button that opens it. When a client pays a deposit, the request changes to Deposit paid on its own.
You also get a notification for each new request, and an email when email is set up. Both open Bookings.
Confirm or decline
Section titled “Confirm or decline”Choose Review on a waiting request. It shows the session, the Preferred dates, any add-ons, the Total, the deposit, the client’s email, when it was Requested, and the client’s message.
- Confirm booking confirms it.
- Decline asks Decline this booking? first. Choose Decline booking to decline it, or Keep it to go back.
Declining doesn’t refund a deposit. If the client paid one, the dialog says so, and you refund it from your Stripe dashboard.
When email is set up on your server, the dialog also has a box to email the client, such as Email Morgan when I confirm or decline, ticked to start with. The client then gets a short email in your studio’s name and language saying the booking is confirmed, or that you can’t take it on the dates they asked for. The confirm or decline is saved even if the email can’t be sent, and the message afterwards says whether the client was emailed.
Requests you’ve confirmed or declined stay under Confirmed and Declined; choose View to see one again.
Moving from server-wide Stripe settings
Section titled “Moving from server-wide Stripe settings”Before studio accounts could be connected, a server could take gallery order payments for one studio through PHOTOGRAPHY_STRIPE_* environment variables. Connecting the studio’s account under Payments replaces them. If you still use them, see Online checkout for photographers for the new names.
Related
Section titled “Related”© 2026 Frameleaf Inc. All rights reserved.
Frameleaf and the Frameleaf logo are Trademarks of Frameleaf Inc.